This Saturday (13th September) I’ll be helping RS Components and Reading Hackspace to launch Superman into near space where he will jump down in the footsteps of Felix Baumgartner and (more famously) Babbage Bear, parachuting safely down to Earth. Full details on how to watch or track will be here on Friday.
“Superman” will be plastic model of course – the real one just uses his personal mono-directional gravity field, as any fool knows! He’ll carry a radio tracker so we’ll be able to plot his course on a live map during the flight. His capsule will carry several cameras – 3 4K models for what we hope will be some stunning video, plus 2 Raspberry Pi cameras which will send images down to the ground throughout the flight.
The project started a few months ago with a meeting at Reading Hackspace, where we discussed the aims and challenges of the project, and how exactly we were going to achieve those aims.

We soon decided to do 2 flights – one to test the new 4K camera and to get some extra footage, and then the main flight. The test flight was about a month ago, for which I mounted a Superman model to a balsa wood frame carrying the new camera, a Raspberry Pi camera, and 2 radio trackers:

The camera and the Pi tracker went inside the central payload area:

I spent some time thinking about how best to mount Superman. I wanted it to look like he was hanging on to a parachute, but without the possibility of him flying out of shot and possibly getting tied up with the support lines after the balloon burst (potentially a very violent part of the flight). The solution came with some hollow braided nylon cord, into which I carefully pushed some short lengths of carbon fibre rod. So, a rigid support that looks like rope:

The rods were pushed into holes in the balsa wood frame above, and Superman’s hands (ouch!) below, then glued firmly with a special 2-part adhesive designed to adhere to any plastic:

Both ends were tied also to remove any possibility of Superman escaping.
The fill was easy, with only light winds …

as was the launch. We then watched the images downloading over the radio link from the Raspberry Pi.
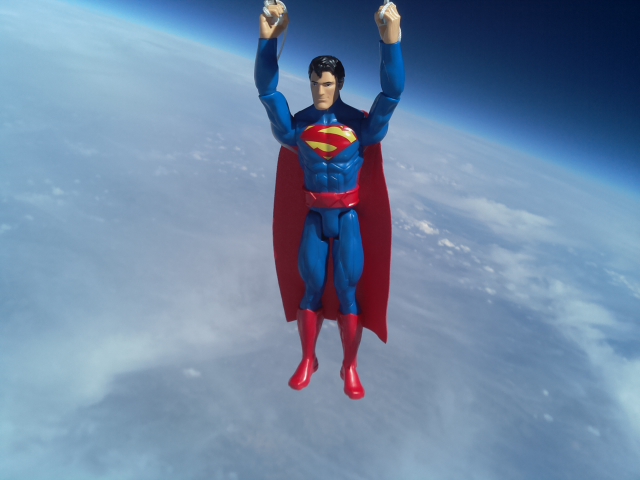 The flight got to about 35.5km (a bit higher than expected) before bursting, after which Superman really did look like he was “Falling With Style”!

Meanwhile the map was showing his path over the ground. We set out to chase about this time, and you can see the long path that Superman took and the much shorter path of the chase car!

We were close by when Superman landed, safely at the edge of a field a short way from where we were parked:

Next job was to check the footage of the new camera we were testing. We ran it in regular HD mode (the SD card wasn’t large enough for the full flight in 4K mode!) but the results did not disappoint:

Congratulations! Awesome project, great photos. I wish you all the best with future flight attempts.
Greetings from Slovenia!
Robert Pucko
congratulations from Spain¡¡¡
Cool stuff, i love the last image where we can see the earth curvature, will you post more pictures from above the earth, thank you for sharing with us your project, i have 3 raspberry pi, and i am using them mostly for simple stuff.
Retropie and XBMC tv, but your project is really cool.
Great stuff! Thanks for sharing! Are there any air space restrictions, danger towards the airplanes and so on?
Flghts are under CAA written permission, with a NOTAM issued to pilots.
Great project!
Greeting from Russia!
Great Stuff … and a Great Project ….
Greetings from India ….
whoever said the earth is flat should see this
Cool! Tell me, which radio channel did you use? gsm?