For my fourth Raspberry PI weather balloon flight I wanted to pack as much into the flight as I could, making full use of what the Pi has to offer:
- 3G link for video and backup telemetry
- Send telemetry over 3G from the launch site
- A live video stream from payload itself, with telemetry overlay, before and for the first few seconds of launch site, over 3G
- Radio telemetry and SSDV images as usual
- Transmit larger photos than before, using twice the transmission speed
- Switch to taking and sending even larger photos when above 30km
- Take full-size images for storage on the SD card
- 3G to automatically reconnect on landing
- Send the landing position over 3G
- Live video stream from the landing site (hopefully in the middle of an empty field)
- Upload all images to a web server by ftp after landing
That’s quite a lot more than before, and with all the overall control software written the day before launch I wouldn’t have been at all surprised to see things go wrong! In the event, the only part that failed was the ftp upload (the very last thing I added).
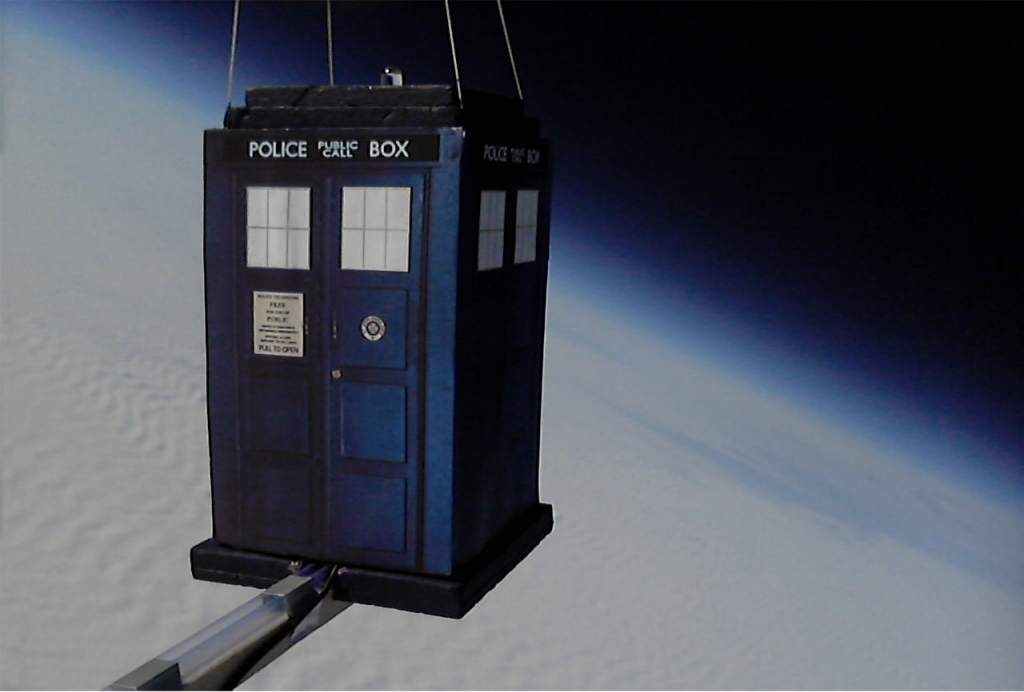
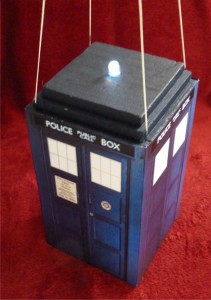
With more electronics than usual to pack inside the payload, what better choice than a TARDIS? Sadly I must have missed my university class on transdimensional engineering, so I had to build a fairly large TARDIS to fit everything inside. Actually the real reason for choosing the TARDIS over say an Apollo Command Module (that’s for next time) was that it’s easy to make from flat sheets of extruded polystyrene! Unsurprisingly, the internet is full of plans and diagrams so it didn’t take long to find what I needed, including the vital fact that the correct colour paint is Prussian Blue :-). A flashing white LED completed the construction.
For the inside I built mounted the electronics either side of corrugated plastic sheet. One side carried the Pi itself (a model B – I needed both USB ports), plus switched-mode regulators for the 3.3V and 5V lines, and a USB 3G dongle for the live video stream and backup telemetry:

On the other side went the 6 Lithium AA cells plus a custom board carrying the NTX2 radio transmitter, UBlox GPS receiver, BMP085 pressure/temperature sensor and an A/D to monitor the battery voltage. A second temperature sensor was added outside the base.

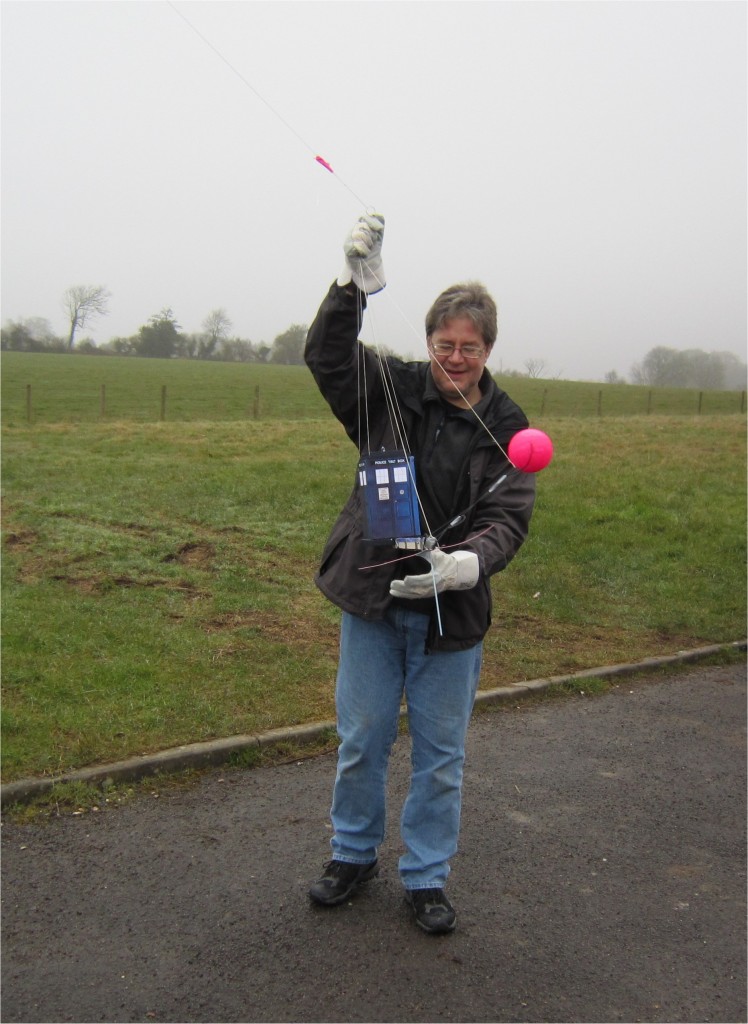
Last but not least I needed a camera to photograph the TARDIS, and again I used a Logitech C270 webcam this time mounted in a fluorescent pink ball (easy to spot at distance after it lands!). You can see that mounted precariously at the back of this image:

The launch day was overcast and cold, but my main concern was the flight path. Too far west and the landing spot would be near Bath; too far east and it would be near Salisbury Plain (where men play with their toys). So I planned the ascent rate//descent rate and burst altitude to land between those extremes. Anthony Stirk (who helped out on my first Pi launch) came along to help, and to launch his own balloon too which he successfully got to float and was last seen flying over Germany. Also Alex Eames of http://raspi.tv/ came to record the launch on video. We launched Anthony’s flight first and then the TARDIS:
The live video streaming from the payload worked well for the launch, though it soon hit the low cloud and then the 3G dropped out (as expected). At 4km the flight software stopped trying to connect through 3G, closed the streaming program, and started to take still images which were then transmitted over the radio link. I’d tested all this stuff with a pretend flight but it was great to see it actually work for real! I’d chosen to transmit images and telemetry at 600 baud, which may sound slow but it’s twice the rate normally used for images and 12 times the normal telemetry speed, and I was concerned that we’d lose lots of image data. However we lost very little – more than on a 300 baud flight, but not enormously so especially considering it was a midweek launch with fewer listeners than normal. here’s one of the images it sent:

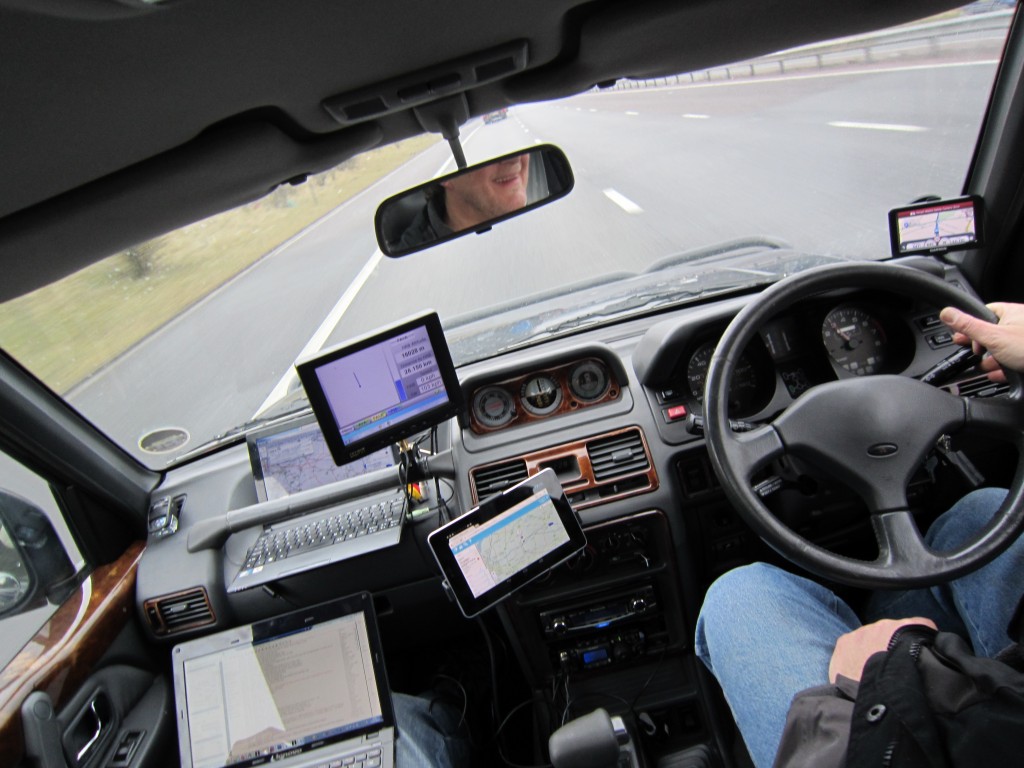
With the launch kit packed back in the car, we stopped by at home so I could tune my receiver there in to help with the downloading, then we set off in the general direction of where the flight was supposed to land. We took my 4×4 which has a car PC installed with a touchscreen on the dash (top of the pic below), plus a Google Nexus 7 mounted below for the map. Anthony had his netbook plus mine to use.
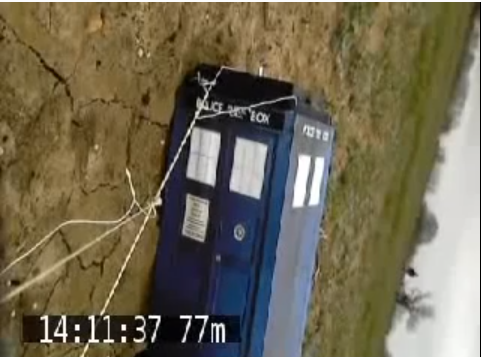
We took the wrong road out of Marlborough which did slow us a little but the flight path meant we had enough time. Once the balloon burst we could see that the landing point was going to be near Melsham, so we headed there, and then on to Whitley as the landing prediction homed in. After a short stop for fuel, and a shorter stop for another purpose (the garage didn’t have a toilet!) we parked up by the main road expecting the payload to land about 300 metres away. In the event it was about 1.3km away, so we didn’t see it. The radio signal dropped out on landing, and the last position we had was for it 200 metres above the ground. We jumped back in the car and headed there, and very soon the map updated with the actual landing position, sent over the GSM link. About that time the live video link burst back into life too! Here’s a still from that:
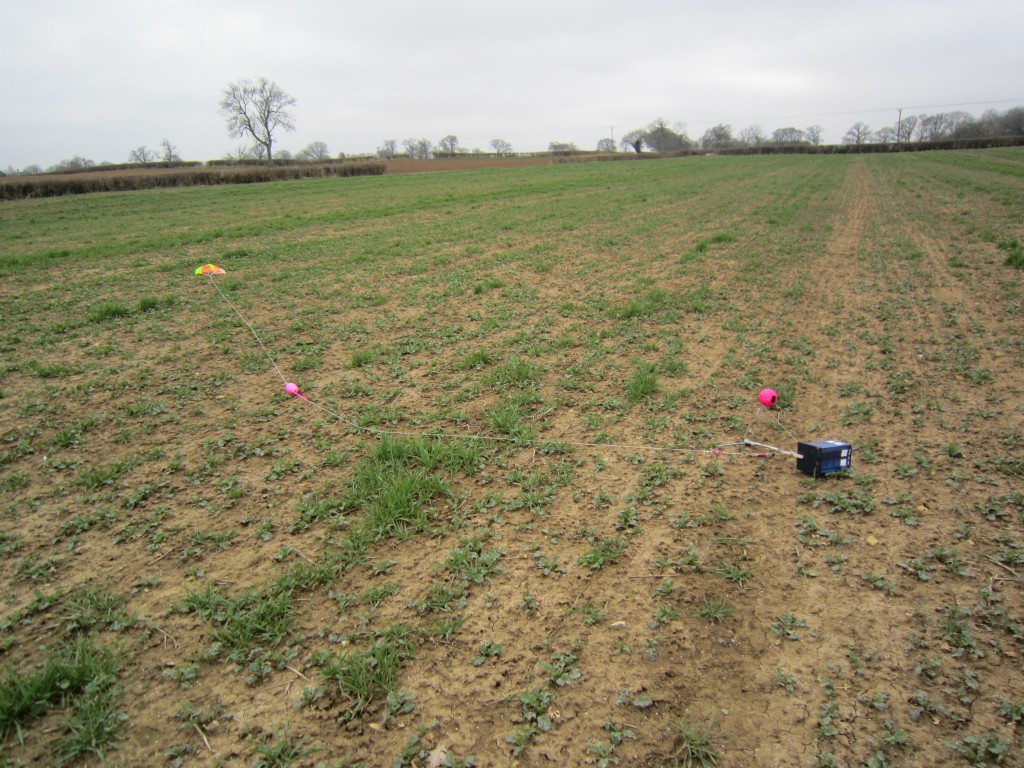
We parked up about 200 metres from the payload. I entered the co-ords into my Android phone and we followed the directions from that, but pretty soon Anthony spotted the flight lying in the field:
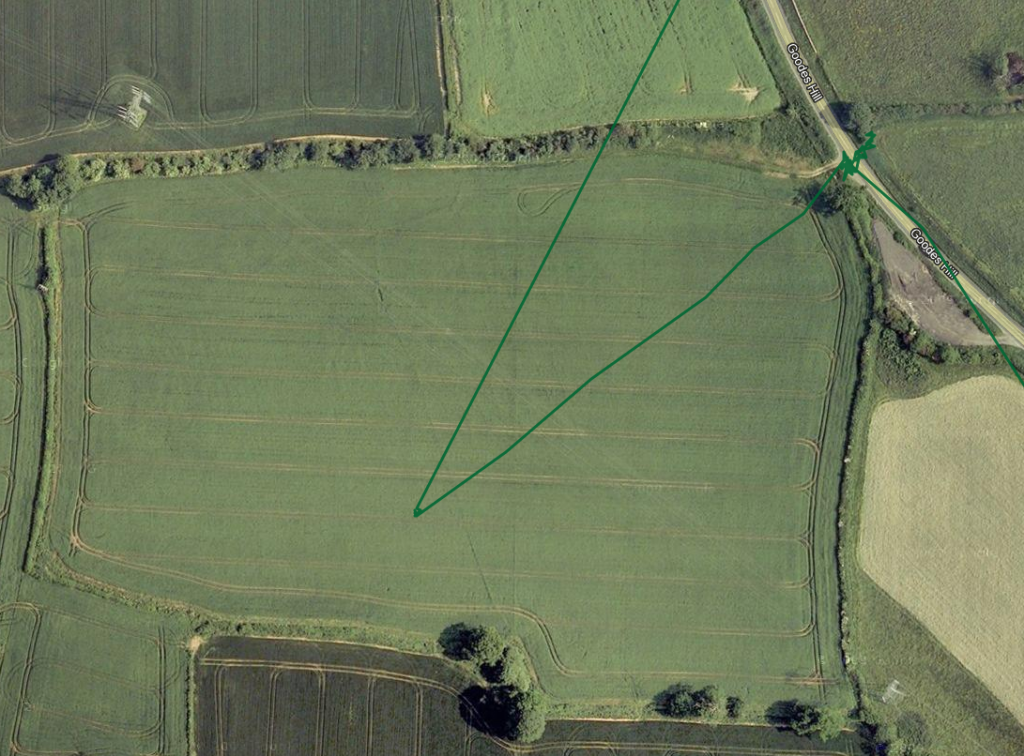
Here’s the flight path to the landing spot (top-right downwards) and the path we took carrying the payload back to the car. Note the HV electricity lines! By my calculation the TARDIS was 37 metres above the ground when it crossed them ….
And here’s the video that the Pi streamed live as Anthony and I recovered it!
That will be the last flight of that particular Raspberry PI – after 4 successful flights I think this is a good time to retire it! My next Pi flight will be a model A with the new Pi camera. Watch this space!
Thanks go to Anthony Stirk for helping with the launch and providing his backup tracker, Alex Eames for recording the launch and preparations, Philip Heron for supplying the SSDV software and recording the landing video stream for me, and the CUSF team for their work on the infrastructure that all us UK HABbers (and some abroad) rely on.
Stop Press Alex just now put up his story and video. Thanks Alex!
Links:
Really glad to hear that the flight went well from your perspective. It was thrilling following it via the live map and IRC. I’m looking forward to the next one, whenever that may be!
Congratulations. Thank you for doing and sharing.
Brilliant! love the live 3G connection. Does the temp fall low enough to effect the lithium batteries?
No, it stayed quite warm inside, and those work down to -40C anyway.
you should take in consideration that even that the temperature drops when you getting closer to out of space, the boiling point drops also due to less air. boiling point in the out of space is around 37 degrees Celsius, so -40C when your boiling point is 37C, is much warmer, so your device was less cold than you think 🙂
It doesn’t use water to measure temperature so I have no idea why you think its boiling point has anything to do with the accuracy of the temperature measurement.
The main factors that do affect accuracy are self-heating of the sensor, lack of convection to remove that heat, and the heating affect of the sun. All of these mean that the actual air temperature is considerably lower than that of the sensor.
Wonderful stuff! May I ask what type of 3G dongle you used? I connect to the internet with Vodafone Mobile Connect ( Huwei K3565 3G dongle) on a Windows machine, and presume it wouldn’t work on the RaspPi for want of the correct drivers.
Best Regards,
Gavin.
Gavin, I used a Huawei E173. The main issue with these things is that they install as a hard drive and you have to run a couple of commands to get it to show up as a modem. After that I used Sakis3g to connect and disconnect. Take a look at http://shkspr.mobi/blog/2012/07/3g-internet-on-raspberry-pi-success/ which should be enough to get you going.
Dave
Wish we could us 3g in the US. Unfortunately, there is an FCC rule against it for balloon flights.
It’s for use on the ground, for the live video streaming of the launch and from the landing spot. 3G doesn’t work at altitude. The main system, over which I send telemetry and still images, uses licence-free radio transmitters that are allowed to be used airborne.
Very cool! Even with all the cloud cover, striations are fantastic. Kudos to your successful build, launch, track and recovery. What would you have been responsible for had it become stranded on those high-voltage lines?
Hi, How are you powering your USB hub for the 3G? I know they consume a lot of amps. I see a switching regulator?? in the picture. Is this powering just the USB hubs or everything?
No USB hub involved. The webcam and the 3G dongle connect direct to the Pi. I had to short out the USB fuses (this was an early Pi) and connect the SMPS direct to the TP1/TP2 test points (thius bypassing the power line fuse).
Dave
It is so amazing.I have quick question.I was wondering what kind wind sensors did use in order to measure wind speed and direction?
GPS
That is beautiful. Have you thought about what you could do to get it to *stay* up there for a long time – days/weeks/etc – and see how far you can get around the world? I think my ultimate goal would be to have something solar powered staying in the sky forever that I can access from the ground.
A couple of days or so is possible with latex balloons, but more requires different materials and can get expensive. It’s been done but not by amateurs, as far as I know.
Hi I was wondering what the coldest temp you recorded on the RPi. I want to use one for arctic research but am not sure how well they work in the cold. Seems like you show that it should be fine.
About -60 outside, with minimal insulation. The Pi gives off a fair amount of heat and the CPU is generally 20C above ambient.
I’m saw someone test one down to -100 or so and it still worked.,
Dave
Hi Dave,
Hope you are well. I told you that I have the Raspberry Pi3 + B for my HAB project.
I ask you: You have a drawing that explains how the connections of the whole set are, for example: Sensors, cameras, batteries, transmitter, etc.
This can serve as a guide for my project. I’ll thank you for any support in comments or suggestions.
I hope your support in what you can. Receive a greeting from Mexico.