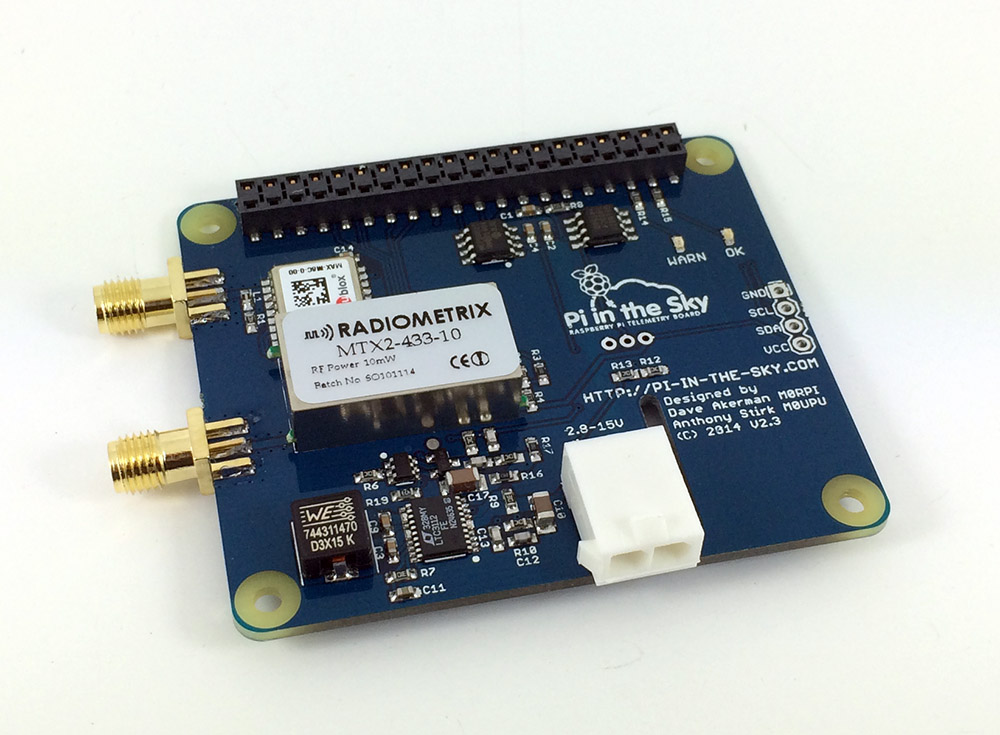
Here (at last – sorry for the delays) is our new version of our Pi In The Sky Board, designed for the Raspberry Pi models A+ and B+.
 These new Pi models required a few changes:
- New smaller form-factor
- Connector to fit the new, larger, GPIO pin header
- Mounting points in all 4 corners
- New higher capacity switch-mode PSU
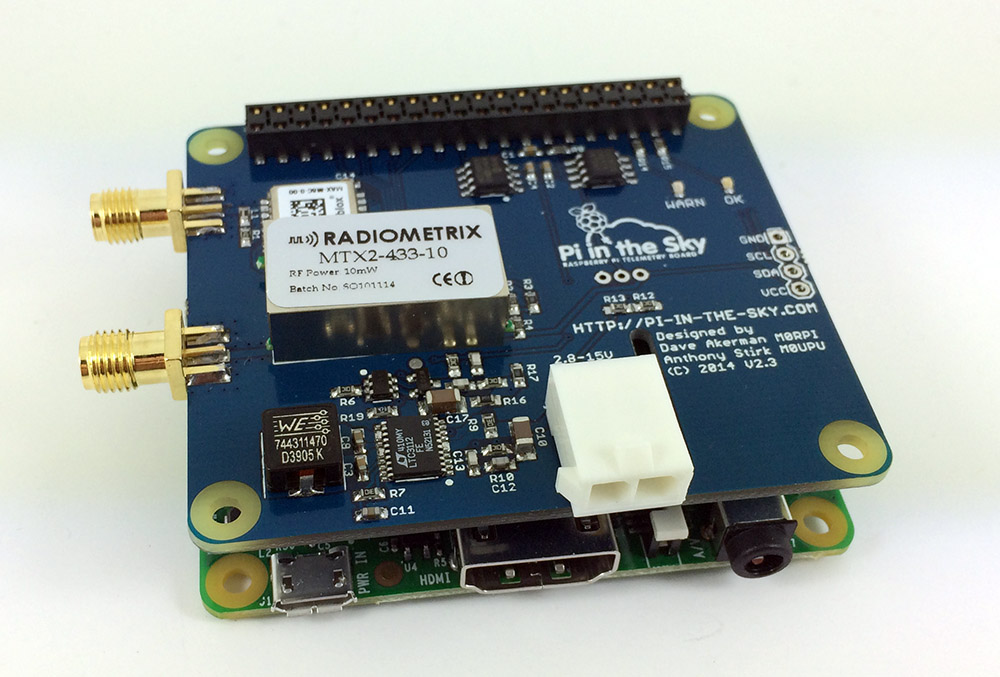
We opted for a stackable GPIO connector, so that the board can be used in conjunction with some add-on boards that we are developing (see below for some details). Unlike the model A and B, the “+” versions cannot be powered solely from 3.3V so we no longer use the trick of connecting 3.3V to the 5V rail, but instead simply supply 5V as normal. The total run time is therefore slightly shorter than before, but not much as the Pi PSU is itself more efficient than on the previous boards.
 The board is on sale now at the HAB Supplies store. Software is available on Github and is only slightly modified from that used by the previous board (and the same software works with either). Support is available here. Now, those add-on boards. These are not yet in production, as we need them to get a few flights under their belts so we know that they’re reliable. First is the LoRa (Long Range Radio) board:
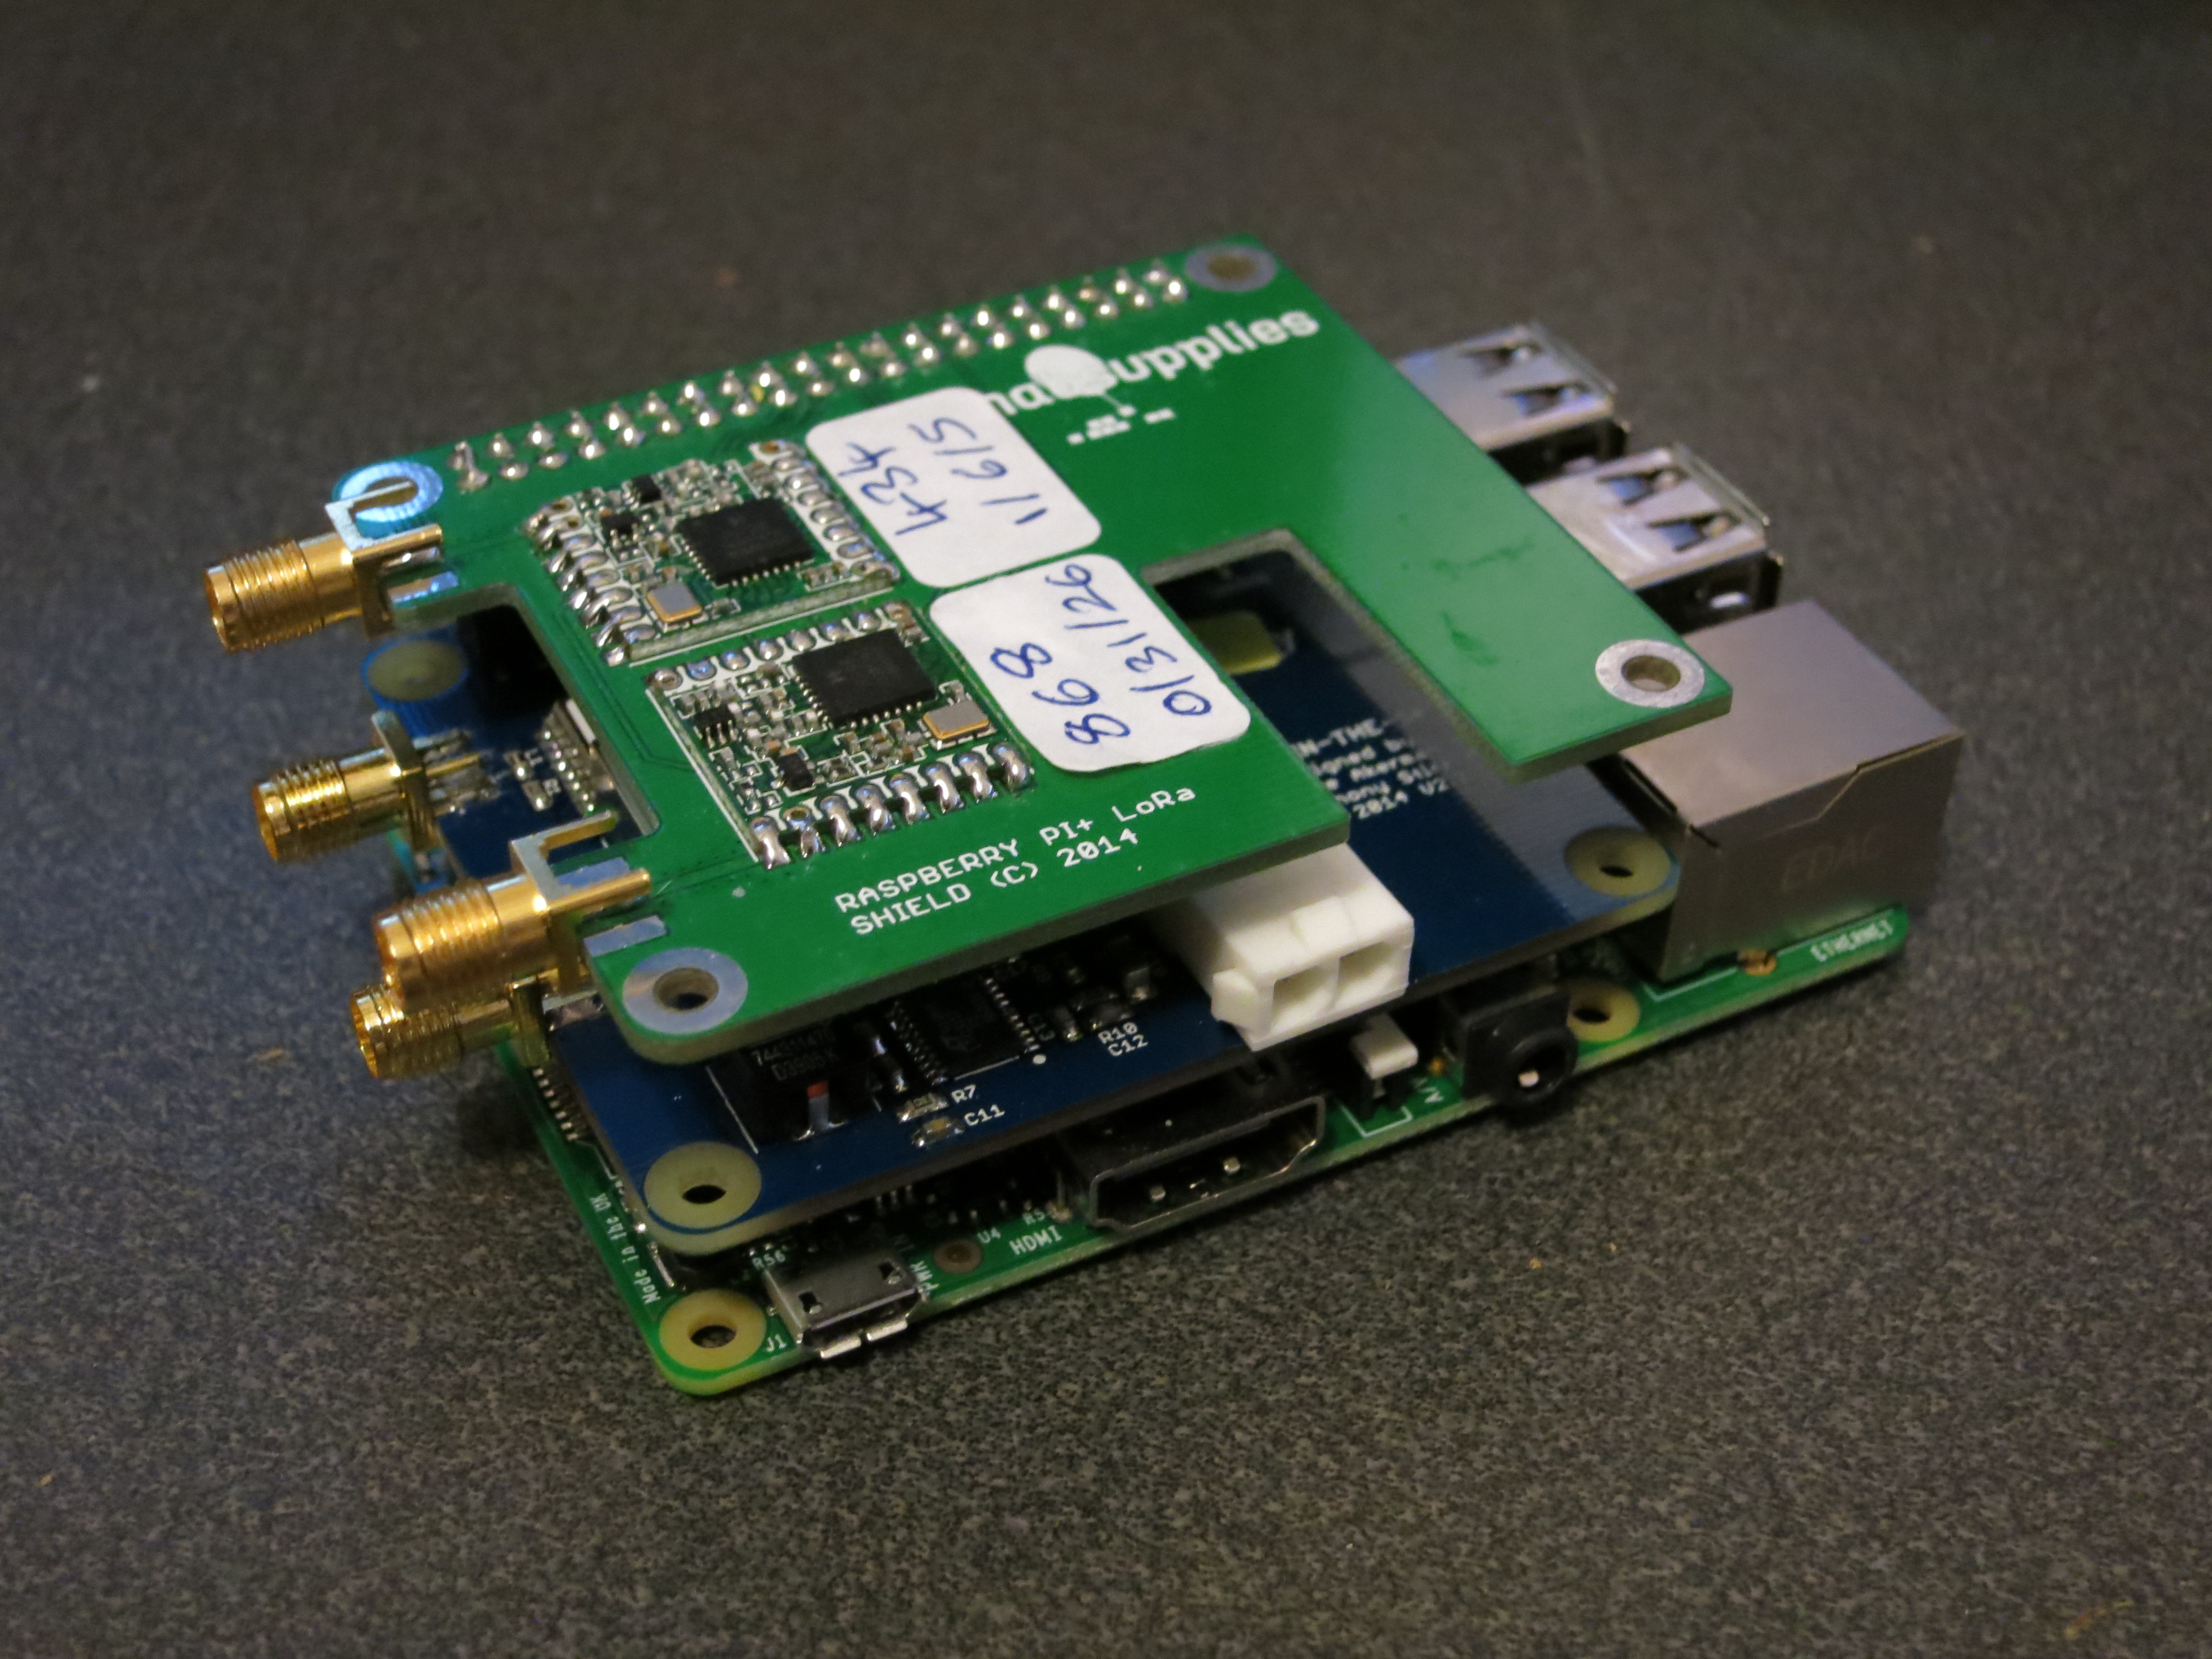
 I have flown LoRa trackers a few times now, with some very good results. The above board has yet to fly but that will happen soon. LoRa promises some advantages over the traditional RTTY system, with probably similar range at low speeds but with the option of higher download speeds and the possibility of an uplink (e.g. to request that the payload detaches from the balloon). If you wish to experiment with LoRa I have uploaded both tracker and gateway software for the Pi to the above Github account, plus Arduino tracker software to my personal account. Here’s the prototype LoRa board attached to a model B+ with the PITS+ underneath.
Our other prototype is an APRS add-on for PITS+. APRS is useful in countries which (unlike the UK) allow the transmission of amateur radio signals from airborne transmitters. APRS is particularly prevalent in the USA where it is used much more than the UKHAS RTTY standard used by the PITS+ board. If you want to try APRS with a Pi, using your own hardware, you can download our code from github (not flight-tested).
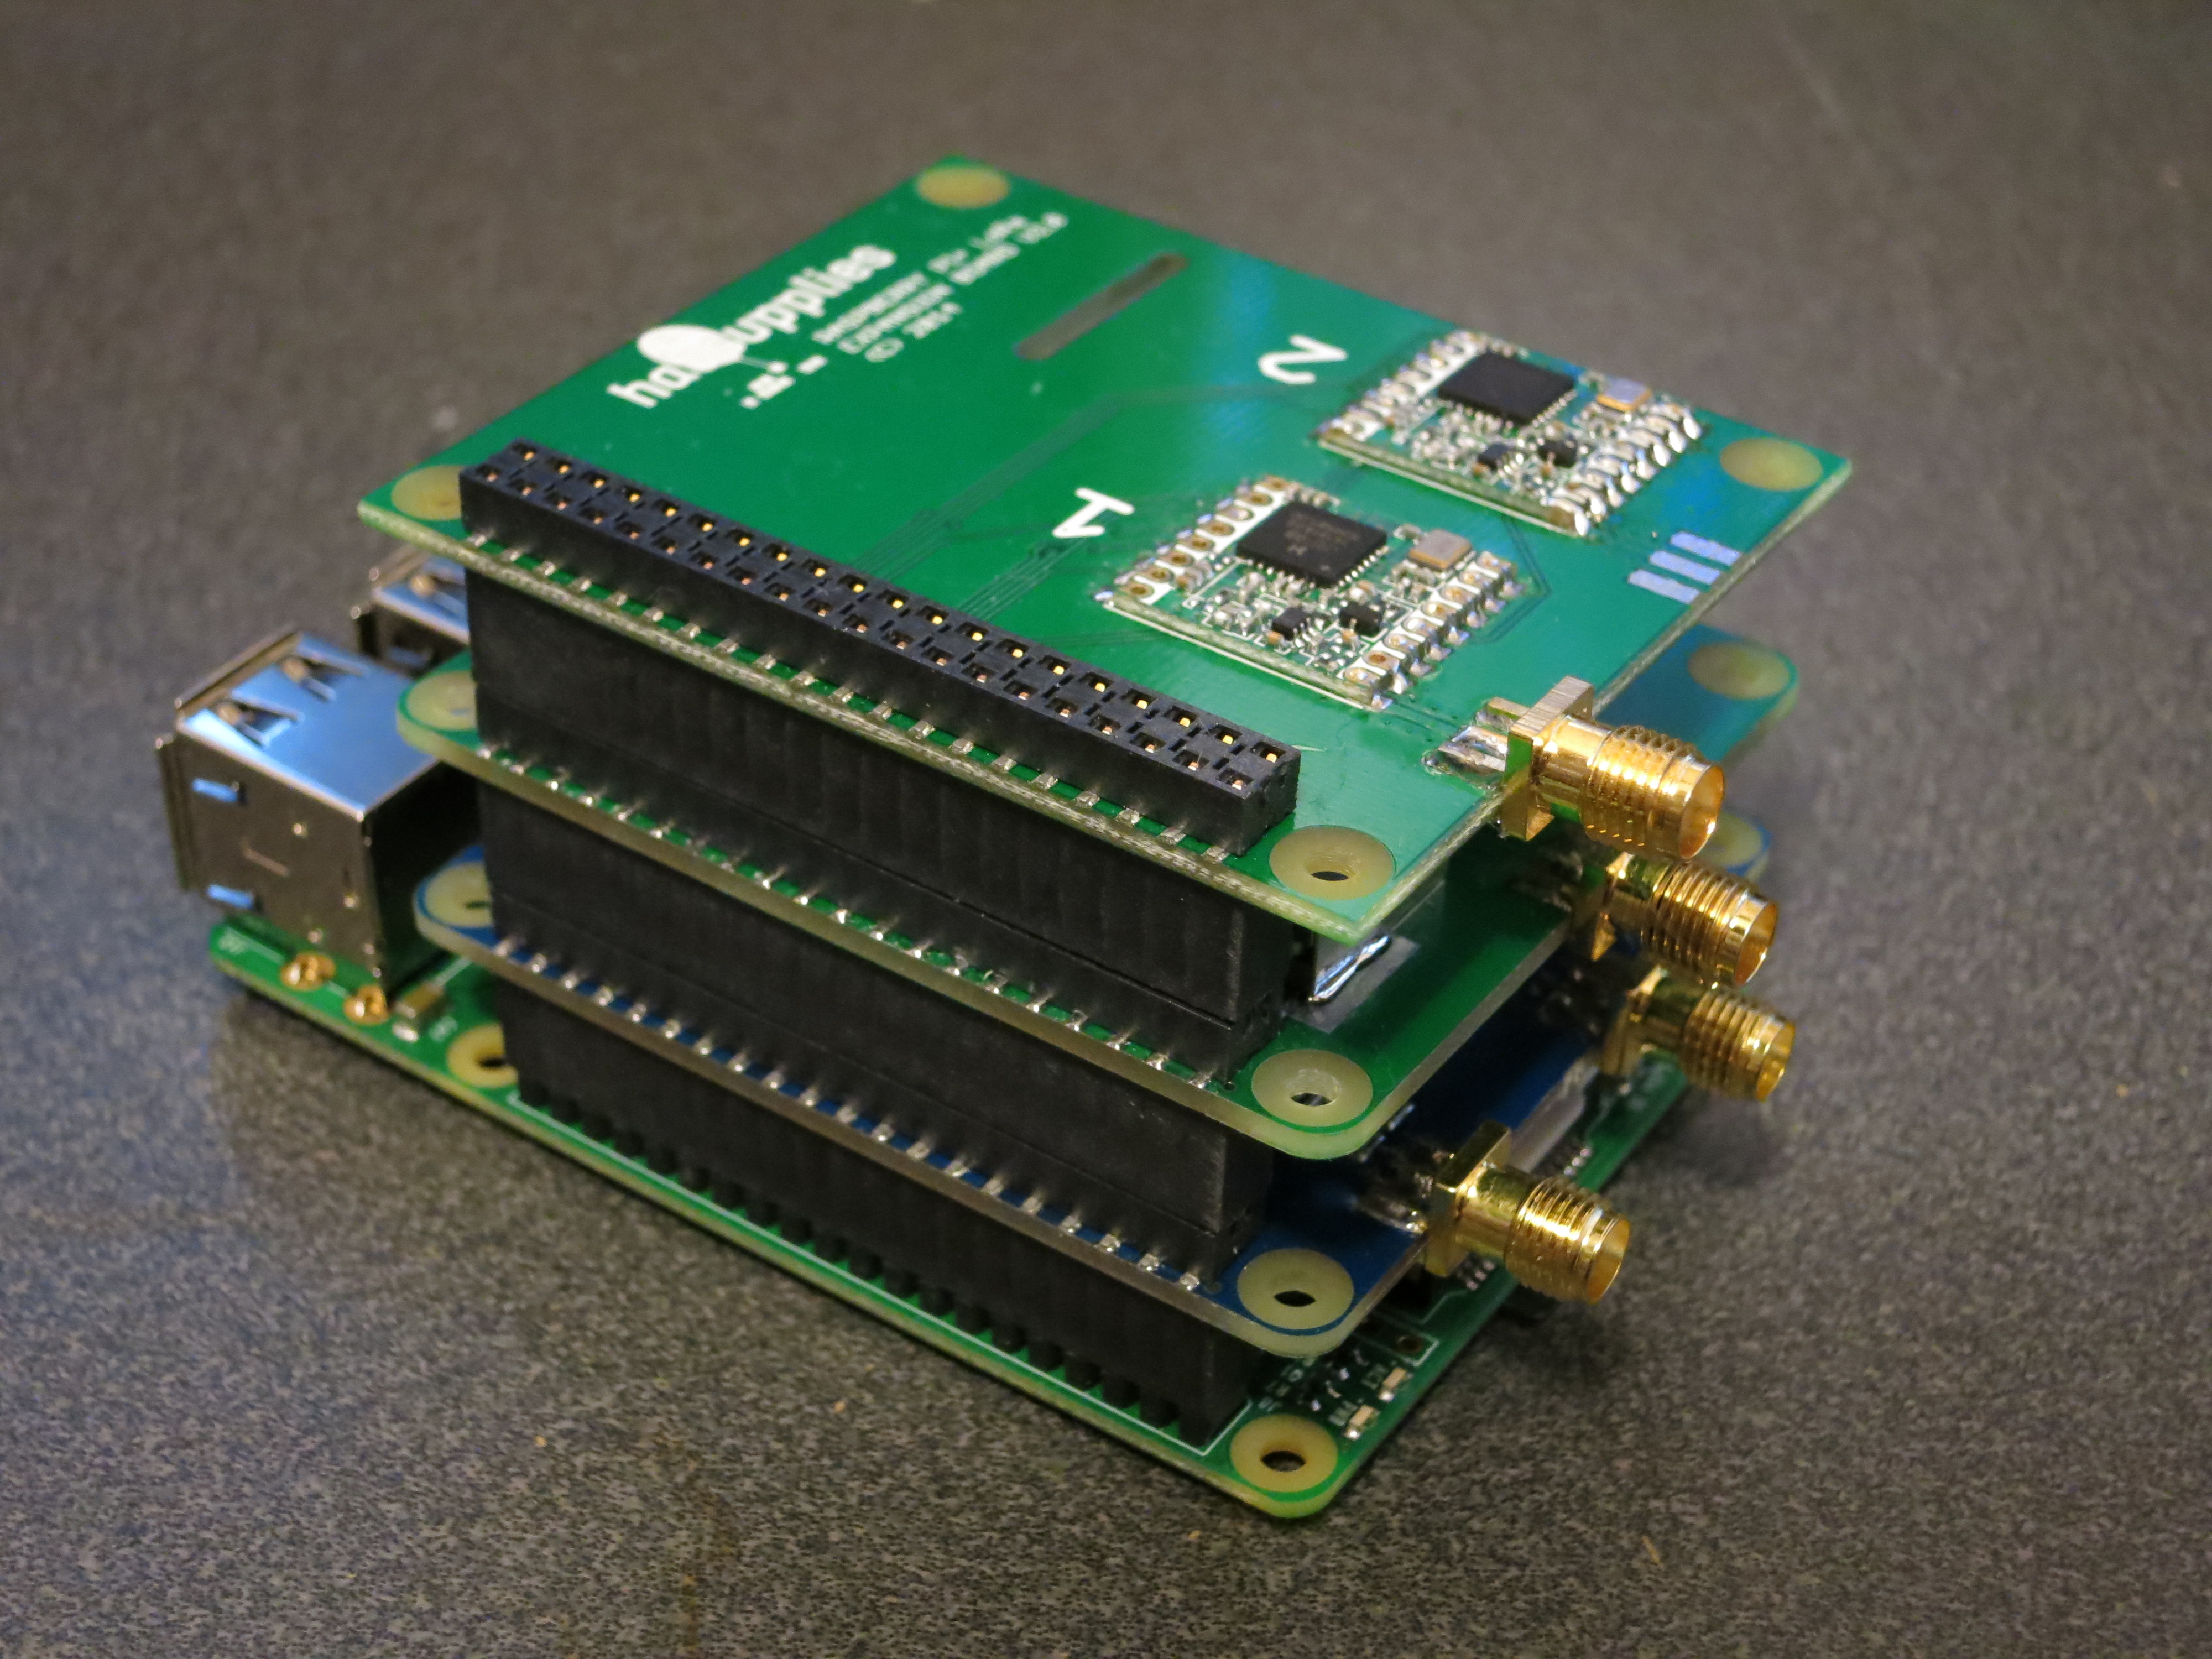
 This particular board has a 144.8MHz transmitter (European standard) but we expect most customers to opt for the 144.39MHz (North America) version. Here’s a tracker-from-hell, with the PITS+, LoRa and APRS boards stacked (and yes, the PITS+ PSU has ample capacity for this configuration!)
 I’ll blog here about flights using these boards as they happen. Now, some general advice on High Altitude Ballooning. Much of this is copied from a previous blog post, but I’m repeating it here (and emphasising a few points) because a lack of proper preparation will almost certainly result in the loss of your flight. Do not, as one recent launcher did, rely on blind luck to get your payload back; test everything and especially test that you can track the flight yourself. Do not try to rush things, and do not leave preparation until 2 days before your flight. If you do, you will very likely lose your flight, and will deserve to do so. Although it’s possible to successfully fly and retrieve a balloon with a simple GSM/GPS tracker, the chances are that this will end in failure and tears. GSM coverage in the UK is nowhere near 100% especially in rural areas which is where we want (and aim) the flights to land. The next step up, in reliability and price, is a “Spot” tracker which works solely via satellites, but those don’t work if they land upside down. Also, neither of these solutions will tell you how high the flight got, or record any science data (e.g. temperature, pressure), or indeed tell you anything about the flight until they land. If you’re lucky. A lost flight is a sad thing indeed.
 For some countries (e.g. USA, but not the UK), if you are a licensed amateur radio operator you can fly an APRS tracker, in which case the flight will be tracked for you via the ground-based APRS network run by other radio hams. Sadly UK laws prohibit radio hams transmitting from an airborne vehicle, so APRS is out for us. For these reasons, pretty much everyone involved in the hobby in the UK, and many other countries, uses radio trackers operating in an ISM (Industrial. Scientific and Medical) band where airborne usage is allowed. These work throughout the flight, transmitting GPS co-ordinates plus temperature and anything else that you can add a sensor for. Many radio trackers can also send down live images, meaning that you can see what your flight is seeing without having to wait for it to land. Here’s a diagram showing how telemetry from the flight ends up as a balloon icon on a Google map:
 What’s not shown here is that, provided you tell them, the other balloonists will help track for you. So not only will you be receiving telemetry and images directly via your own radio receiver, but others will do to. All received data is collated on a server so if you do lose contact with the flight briefly then it doesn’t matter. However, this does not mean you can leave the tracking up to others! You’ll need to receive at the launch site (you have to make sure it’s working!) and also in the chase car once it lands. The expense of doing this is small – a TV dongle for £12 or so will do it, with a £15 aerial and a laptop, ideally with a 3G dongle or tethered to a phone. Traditionally, balloonists build their own radio trackers, and for anyone with the skills or the time and ability to learn programming and some digital electronics, this is definitely the most rewarding route to take. Imagine receiving pictures of the Earth from 30km up, using a piece of kit that you designed and built and programmed! So if you are up to this challenge (and I suspect that most people reading are) then I recommend that you do just that. It takes a while, but during the development you’ll have plenty of time to research other aspects of the hobby (how to predict the flight path, and obtain permission, and fill the balloon, etc.). And when you’re done, you can hold in your hand something that is all your own work and has, to all intents and purposes, been to space.
 For some though, it’s just not practical to develop a new tracker. Or you might be a programming whizz, but not know which end of a soldering iron to pick up. It was with these people in mind that we (myself and Anthony Stirk – another high altitude balloonist) developed our “Pi In The Sky” telemetry boards. Our principle aim is to enable schools to launch balloon flights with radio trackers, without having to develop the hardware and software first. It is also our hope that older children and students will write their own software or at least modify the provided (open source) software, perhaps connecting and writing code for extra sensors (the board has an i2c connection for add-ons). The board and software are based on what I’ve been flying since my first “Pi In The Sky “flight over 2 years ago, so the technology has been very well proven (over 20 flights and no losses other than deliberate ones!). It comes in a kit complete with a GPS antenna, SMA pigtail (from which you can easily make your own radio aerial), stand-offs for a rigid mounting to the Pi board, and battery connectors. Software is on https://github.com/piinthesky, with installation instructions at http://www.pi-in-the-sky.com/index.php?id=support, or there is a pre-built SD card image for the tragically lazy. We do recommend manual installation as you’ll learn a lot. By now you’re probably itching to buy a board and go fly it next weekend. Please don’t. Well, buy the board by all means, but from the moment you decide that this is the project for you, you should task yourself with finding out all you can about how to make your flight a safe success. For a start, this means learning about applying for flight permission (which, if you want to launch from your garden at the end of an airport runway, isn’t going to be given). Permission is provided together with a NOTAM (NOtice To AirMen) which tells said pilots what/where/when your launch will be, so they can take a different path. You also need to learn about predicting the flight path so that it lands well away from towns or cities or motorways or airports. I hope I don’t need to explain how important all of this is. There’s lots more to learn about too, for example:
- How to track the flight – remember you MUST NOT rely on others to track it for you – you HAVE to be able to track the flight yourself both at launch (to confirm it’s all working) and after landing (so you can find it).
- How to fill a balloon
- Where to buy the balloon
- What size balloon? What size parachute? How to tie it all together?
None of this is complicated (it’s not, ahem “rocket science”), but there is a lot to know. Don’t be surprised if the time between “I’ll do it!” and “Wow, I did it!” is measured in months. Several of them. In fact, worry if it’s less than that – this research takes time, as does practice in tracking. If at all possible, practice your tracking skills by tracking someone else’s flight before your own. At a minimum, send a friend off, with tracker in hand, to play “hide and seek” after which you then go and locate him using nothing your tracking setup. He should be at least half a mile away perhaps further. If you cannot find your friend then you’re not going to be able to find a balloon payload either! We will be producing some teaching materials, but meantime please see the following links:
- Pi In The Sky information
- PITS board on github
- UKHAS Wiki
- Tracking A Flight
- Using an SDR to track
- To buy the PITS board
- Balloons and Parachutes etc
- My blog
As for the board, it provides a number of features borne out of a large number of successful flights:
- Efficient built-in power regulator providing run time of over 20 hours from 4 AA cells (using a model A Pi)
- Highly sensitive UBlox GPS receiver approved for altitudes up to 50km
- Temperature compensated, license-free (Europe) frequency agile, 434MHz radio transmitter
- Temperature sensor
- Battery voltage monitoring
- Sockets for external i2c devices, analog input, external temperature sensor
- Allows use of Raspberry Pi camera
- Mounting holes and spacers for a solid connection to the Pi
The open-source software provides these features:
- Radio telemetry with GPS and sensor data using UKHAS standard
- Radio image download using SSDV standard
- Multi-threaded to maximize use of the radio bandwidth
- Variable image size according to altitude
- Stores full-definition images as well as smaller transmitted images
- Automatically chooses better images for download
- Configurable via text file in the Windows-visible partition of the SD card
- Supplied as github repository with instructions, or SD card image
What does the red light under “R15” mean
No GPS lock.
Is the PITS board compatible with the Raspberry Pi 3 B?
No. This is stated clearly on the PITS web site.
The V3 allocates the main serial port to the bluetooth link, leaving the second serial port on the GPIO pins. The latter port changes its speed with CPU speed, which then breaks the radio transmissions. It is probably possible to change this mapping but it isn’t something we have investigated; it’s quite enough work keeping up with changes in serial port handling in Raspbian.
We may start supporting it if/when serial port support in Raspbian settles down. For now, it’s too much work on a moving target that is, frankly, a poor choice for HAB anyway (use an A+ or Zero).
V3 B is now supported. Still not recommended though !
Dave,
Do you have the high altitude balloon telemetry, mapping and navigation software build on a Raspberry Pi, using an LCARS UI published or download access from your September 15th 2016 Youtube demo?
Thank you for raw great details you have published over the years.
Jeff
Hello Dave,
I was wondering if I could incorporate an APRS board on the LoRa Gateway and use it to communicate with the ARPS that is connected to the PITS. Is that possible?
Thank you very much.
Rather than use an APRS receiving board, use an SDR plus software (RTL_FM and Direwolf). See, for example, http://www.rtl-sdr.com/a-pre-built-raspberry-pi-image-for-using-an-rtl-sdr-as-an-aprs-rx-igate/
Hello Dave,
First of all thank you for your work.
I am new to the pits project so excuse my silly question. When the the transmission happens through the APRS board does the LoRa still operate or is it dormant?
Thank you.
All 3 transmission modes (APRS, RTTY, LoRa) are independent, so yes they can all transmit at the same time.
Hello, i am a licenced UK radio amaetur (MM0MOB), i am wanting to setup a stand alone APRS repeater with an old original Raspberry Pi B, would it be possible to use the APRS board to facilitate this?
Hello Dave,
I am new to this pits project so I’m sorry for my question.
I recently buy a full package of pits (including LoRa and Hx1 Expansion board).
But it seems like I am unable to stack it using provided header. Do I need to buy another header in order to stack all this board?