Yesterday I launched a FlexTrak STM32 tracker to test my latest firmware, test my HAB Base software during a flight, and to try out a Raspberry Pi camera with a wide-angle lens. It was also my first flight using a 3D-printed tracker holder and aerial.
3D-Printing and HAB
It took me a long while to decide to buy a 3D printer, as I wondered if I’d use it very much, but the reality is that once you have one you find no end of things to make. After a while though I found that there are things I wanted to make that I couldn’t find a design for, so I started to play with TinkerCAD which is an online 3D designer that is pretty easy to use.
One thing I wanted to do was to make payloads easier to build, plus be more resilient and re-usable. So I set about designing tracker holders that incorporate an aerial with holes above and below for easy connection to the parachute above and another payload below. My printer has a print base of about 26 x 26cm, meaning I had to print in 2 parts so I made separate designs for the tracker holder the aerial, with mating surfaces that can be glued or screwed together. Here’s the holder for FlexTrak:
https://www.tinkercad.com/embed/ev7vAJZy4QG?editbtn=1

Note the ring at the top to connect to the payload train, the holes for screwing on the tracker, the indented strip for where the GPIO pins go, the hole at the bottom for the radio aerial connector and the hole at the back for the Pi camera cable to exit.
This is the 434MHz aerial for FlexTrak:
https://www.tinkercad.com/things/jCZYnFBzhaU-aerial434ft

Note the hole for the SMA socket, the grooves for the aerial wires, and the hole for mounting a payload below. The latter avoids the usual problem of the hanging cord fouling the aerial.
To complete the aerial, insert an SMA chassis plug in the hole, with the plug side above and the solder pin below. Solder solid wire to the pin, cut at a total of 164mm, run it along the centre groove and fix with superglue. Similarly, solder 2 wires to the ground connection and run along the horizontal radial groves. The aerial can then be fitted to the assembled tracker. I found that the SMA connection was solid enough but you can screw or glue (superglue or hotmelt) the mating surfaces together if you wish.

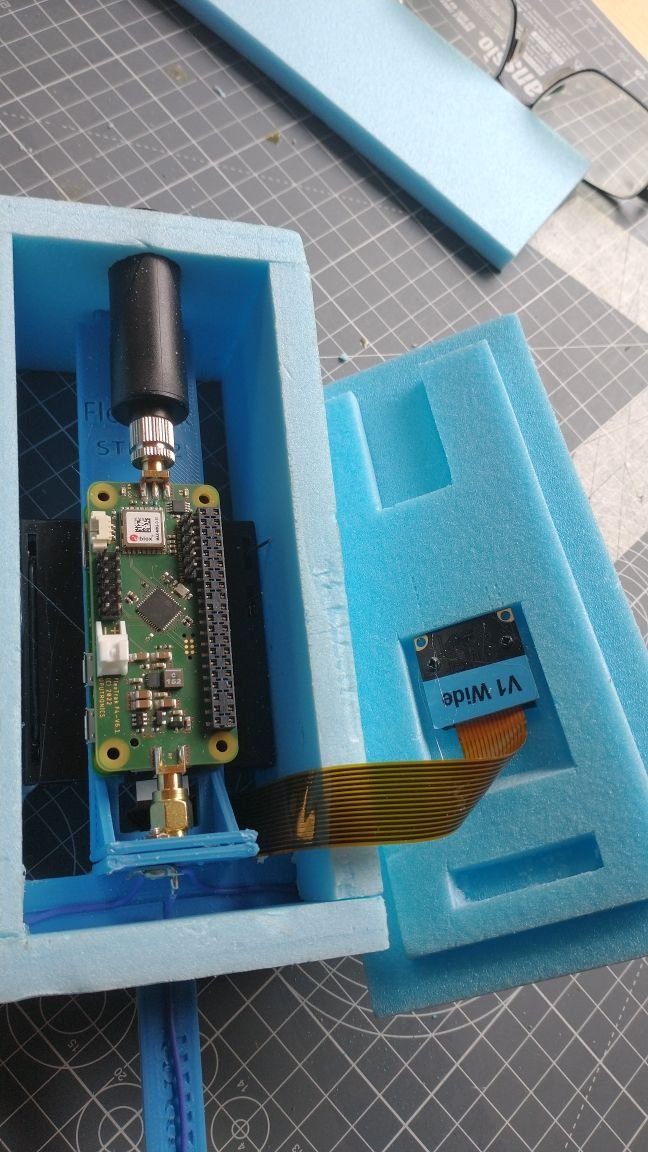
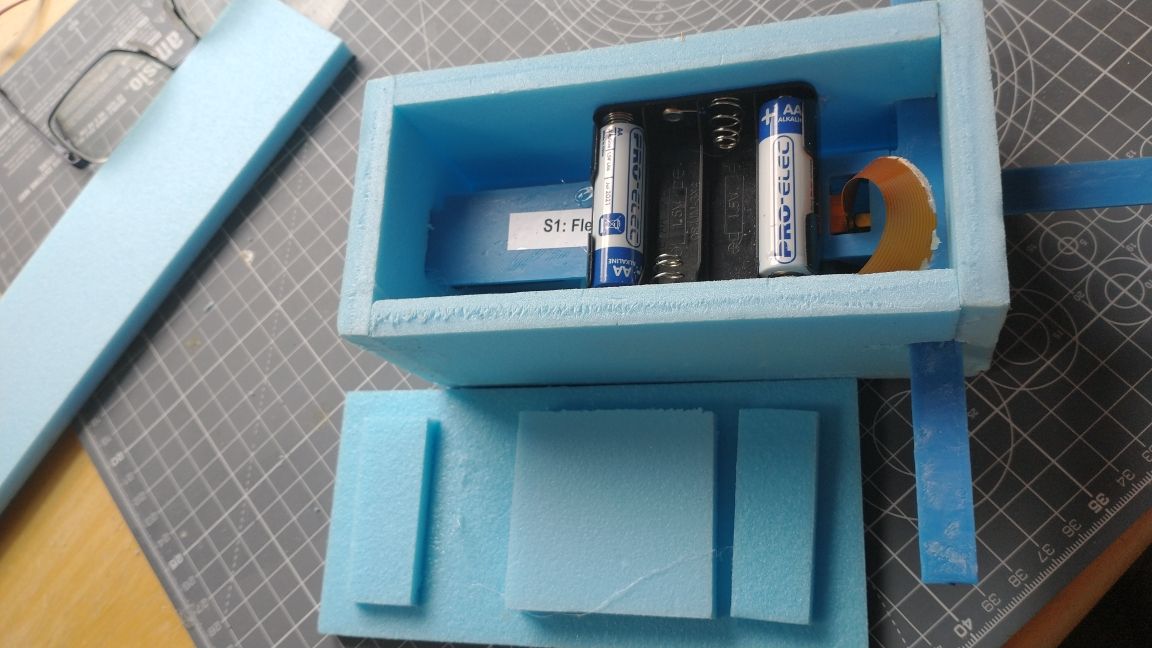
To complete the tracker glue a battery pack to the rear of the frame, connect a camera to the Pi, and mount the lot in some expanded polystyrene foam:
Flight Planning
I didn’t announce the flight as it was planned to be a short flight with a small balloon landing locally. However the predictions showed that the landing area with a small balloon was the other side of the a motorway, and the only way I could keep the flight away from local towns and motorways was to send it up quite high where it would be taken west into a very rural area.
Going high means using a large balloon and a light payload. I was hoping to test a second tracker but doing so would mean using a rather larger balloon, so I left that for another day. I settled on a 1000g balloon. Here’s my launch data sheet:

I also checked the changing flight profiles during the day, and opted for a 3pm launch to land in the best area.
What I didn’t take into account, but should have, was that hydrogen flights don’t have a constant ascent rate. The prediction software works best for helium which does, but for hydrogen the initial ascent is slower and the later ascent faster than the prediction assumes. For my flight, that meant more time going east and less time higher up going west, so the eventual landing spot was well east of prediction. The landing area was still safe, as I’d built in a large margin as we should always do, but it meant landing in an area with quite a lot of trees!
Flight Check List
For those new to HAB, it might be worth me going through my usual launch procedure for my solo launches. For those launching with a team, many of these tasks can be done in parallel.
- Final check on predictions (worth doing as the prediction data updates every 6 hours and it’s best to use the latest data). From this I would hope to confirm my choice of balloon and gas fill. Most launchers will only have the one balloon and parachute, but even then you can modify the flight profile by adjusting the amount of gas, or even adding ballast or “reefing” the parachute to make it fall a bit faster.
- Fill a water bottle (I use empty/cleaned milk bottles as they have a useful handle for attaching cable ties to) according to the weight you calculated (see my sheet above for an example).
- Set out the launch area. Be aware of where the wind is coming from so you can have that behind you while you are filling (so the balloon doesn’t want to hit you in the face). Lay out the ground sheet, with a weight or peg at each corner if needed. Have the gas cylinder to your right (if you are right-handed) and a box with duct tape, cable ties, scissors and wire cutters to your left. Connect the balloon filler to the cylinder, and cable-tie the water bottle to the filler. My filling arrangement is unusual as I use the cylinder valve to regulate flow, but everyone else can open the cylinder valve at this point (and use the filler valve to start/stop flow later).
- Connect the payload(s) and parachute together with cord. I use 10 metres from payload to parachute, and 5 metres from there to the balloon. Place the balloon end of the cord to your left, and place the payload on a table or bench.
- Start up all the receivers. I generally use one receiver at home, and 2 or 3 in the chase car, but 1 at each location is enough. My car has a secondary battery for the HAB receivers and a 4G router, so I can leave everything running for many hours without the engine running. For most people they will use a laptop so ensure the laptop is charged, and take a 12V charger for it, or a mains charger and inverter.
- Start the tracker(s). Ensure that all receivers are receiving OK, and are uploading to habhub. Check that the tracker(s) have GPS lock, and that they all appear on the habhub map. Close the tracker payloads.
- If you have any other payload electronics e.g. a camera start it now if it has enough battery power for the launch preparations (30 minutes at this point) and flight. If not, delay the camera startup and payload closure till the balloon is ready to launch.
- Fill the balloon till it can just lift the water bottle, without wind assistance off the ground and keep it aloft. If it falls back to the ground then add more gas. Once it can keep the bottle off the ground, maybe with a slight ascent, the fill is complete.
- Fit 2 cable ties to the neck.
- Tie the payload cord to the neck.
- Stand or sit on the cord. Carefully remove the balloon neck from the filler, keeping a tight hold of the balloon.
- This is the first bit where it’s handy to have a helper, though it’s certainly possible to do solo. Fold over the balloon neck so it’s covering the 2 cable ties. Add a tie around the fold. Add a second, then wrap with duct tape.
- If it’s at all windy, or you have a heavy payload, wear strong gloves for the launch. The pull of the balloon – from lift and wind – can easily cause the cord to cut through your skin.
- This is also easier with a helper – I have to carry the balloon from the filling area in my garden into the adjacent field. Everything has to be carried – payload, parachute and cord – off the ground otherwise the cord will snag and you will spend the next 10 minutes untying the inevitable knots. As we had to do when my helper didn’t understand my request!
- Slowly allow the balloon to rise by tightly holding the cord and swapping the cord between your hands. As you do so, check that the parachute is the right way up (!!) and continue till you have the payload just below your hands.
- Check the sky for any aircraft that that are flying past – usually because the pilot saw your NOTAM and thought they’d come along and watch – and launch if safe to do so.
My launch site is doesn’t have a nearby airport, so I have no need to call Air Traffic Control, but if yours does then your launch permission will state that you must call ATC before launch, typically 15 minutes before, so add that into your checklist at an appropriate point.
The Launch
Aside from the delay untying the aforementioned and unintended knotting, the launch process went smoothly and easily. I then watched the flight online and with my HAB Base program, with the latter being fed from my home receiver (a LoRa Gateway with aerial in the loft). All home and car receivers were feeding habhub and I noticed how much better my car receivers were doing, probably because of the lack of house roof in the way. I do have other receivers available, in my HAB shack and mountable on a 12m telescopic pole, but even the loft aerial managed to locate the flight down to an altitude of 2,200 metres which is pretty good considering the flight was the opposite side of the hill that my house is on.
The flight was predicted to land about 40 minutes away, which is approximately the descent time from burst, so we started chasing shortly before the predicted burst so we could hopefully get to the landing area before the flight landed. The burst altitude was calculated to be 36km, and the balloon actually gave way at 36.6km. Often these Hwoyee balloons manage about 2km above prediction but that’s not always the case and this balloon was 3 years old. Anyway, I’d planned the flight for a range between 36 and 38km this was inside my planning.
We saw a slight difference between the on-board landing prediction and the online one, and as the flight descended the two moved towards each other. The online one was initially closest to the final position which is to be expected but both were plenty good enough to aim for in the car.
We aimed for the closest road to the prediction, and got there a couple of minutes before landing, but with trees limiting our view we didn’t see the flight descending. We did however continue to receive telemetry so we had our landing position. Putting the map into satellite view we could see that the flight had avoided all the trees and found a nice field to land in. Excellent!
The next step was to find a route to the payload. Although we were less than 500 metres away, there was no path available so we checked ordnance survey mapping and found a public footpath that got close to the payload and was accessible from a road the other side of the payload. So we had to drive away from and around the landing position – which may have looked odd to anyone watching our progress online – to get to the footpath.
As we got close we spoke to some locals who said that they were walking that way anyway, so just follow, which we did …

We left the car by the road next to the footpath, and set out on foot …

As I said, we had to drive the long way round to make the on-foot part feasible, so here’s our path in red from the point where we were waiting when the balloon landed, to the footpath by road then by foot out to the payload:

We saw the bright parachute easily and walked across the grass field to collect it:


And to show how close this was to trees …
Finally, here are some photos from the camera. Clearly (or otherwise) the focus was set too short; it had been set up but it is easy to knock out of focus and that’s what happened. Next time, glue! Here’s my Star Trek Tricorder receiving telemetry from the tracker:


